Dim b As UltraGridBand = Me.UltraGrid1.DisplayLayout.Bands(0)
Dim theNameGroup As UltraGridGroup = b.Groups.Add("Name")
Dim theAddressGroup As UltraGridGroup = b.Groups.Add("Address")
Dim thePhoneGroup As UltraGridGroup = b.Groups.Add("Phone")
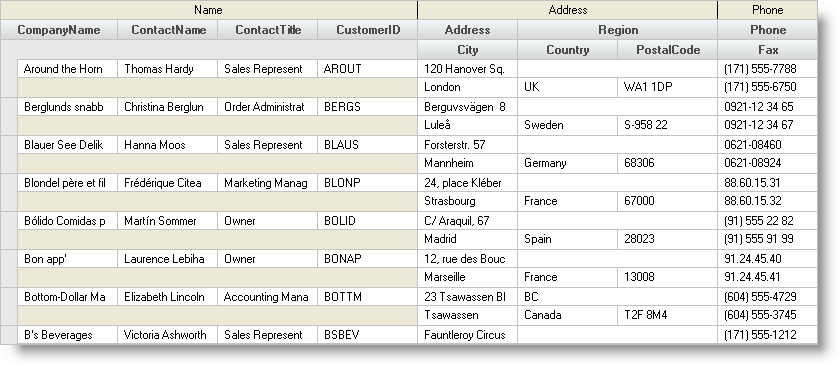
A single row in the WinGrid™ can contain multiple Levels.
To use multi-level rows, you must have your columns divided into Groups . Start by creating some groups.
Suppose your database contained personal address information. Your fields might include First Name, Last Name, Street Address, City, State, Zip, Phone Number, Fax Number.
In this case, you might want three Groups like Name, Address, and Phone.
In Visual Basic:
Dim b As UltraGridBand = Me.UltraGrid1.DisplayLayout.Bands(0)
Dim theNameGroup As UltraGridGroup = b.Groups.Add("Name")
Dim theAddressGroup As UltraGridGroup = b.Groups.Add("Address")
Dim thePhoneGroup As UltraGridGroup = b.Groups.Add("Phone")
In C#:
UltraGridBand b = this.customersUltraGrid.DisplayLayout.Bands[0];
UltraGridGroup theNameGroup = b.Groups.Add("Name");
UltraGridGroup theAddressGroup = b.Groups.Add("Address");
UltraGridGroup thePhoneGroup = b.Groups.Add("Phone");
You can then assign each Column to a particular Group.
In Visual Basic:
b.Columns("CompanyName").Group = theNameGroup
b.Columns("ContactName").Group = theNameGroup
b.Columns("ContactTitle").Group = theNameGroup
b.Columns("CustomerID").Group = theNameGroup
b.Columns("Address").Group = theAddressGroup
b.Columns("Country").Group = theAddressGroup
b.Columns("City").Group = theAddressGroup
b.Columns("Region").Group = theAddressGroup
b.Columns("PostalCode").Group = theAddressGroup
b.Columns("Phone").Group = thePhoneGroup
b.Columns("Fax").Group = thePhoneGroup
In C#:
b.Columns["CompanyName"].Group = theNameGroup;
b.Columns["ContactName"].Group = theNameGroup;
b.Columns["ContactTitle"].Group = theNameGroup;
b.Columns["CustomerID"].Group = theNameGroup;
b.Columns["Address"].Group = theAddressGroup;
b.Columns["Country"].Group = theAddressGroup;
b.Columns["City"].Group = theAddressGroup;
b.Columns["Region"].Group = theAddressGroup;
b.Columns["PostalCode"].Group = theAddressGroup;
b.Columns["Phone"].Group = thePhoneGroup;
b.Columns["Fax"].Group = thePhoneGroup;
To create a new level, set the LevelCount property.
In Visual Basic:
b.LevelCount = 2
In C#:
b.LevelCount = 2;
At this point, all the columns are on Level 0, and Level 1 is empty (Note that Levels are 0-based). Move some columns to the second (lower) level by setting the Level property.
In Visual Basic:
b.Columns("City").Level = 1
b.Columns("Country").Level = 1
b.Columns("PostalCode").Level = 1
b.Columns("Fax").Level = 1
In C#:
b.Columns["City"].Level = 1;
b.Columns["Country"].Level = 1;
b.Columns["PostalCode"].Level = 1;
b.Columns["Fax"].Level = 1;
