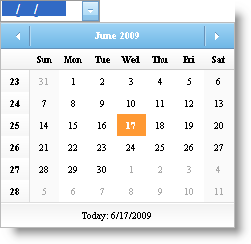
WebMonthCalendar1.EnableWeekNumbers = true
WebDatePicker™ comes equipped with a standard drop-down calendar control to allow your end-user to pick dates when editing data. However, if you wanted to provide your end-users with a more robust, feature-rich drop-down calendar, WebDatePicker allows you to use WebMonthCalendar™ as its drop-down calendar. You can associate WebMonthCalendar to WebDatePicker in one of two ways:
Controls exist in same container — When both controls exist in the same container, you can set the WebDatePicker control’s DropDownCalendarID property to the WebMonthCalendar control’s ID property.
Controls exist in different containers If one control exists in a different container than the other control, you can set the WebDatePicker control’s DropDownCalendarID property to the WebMonthCalendar control’s ClientID property instead so that WebDatePicker can find the correct instance of WebMonthCalendar. In this case, you should also ensure the following style attributes for the WebMonthCalendar:
display:none;
visibility:hidden;
From the Microsoft® Visual Studio® Toolbox, drag and drop a ScriptManager component, a WebDatePicker control and a WebMonthCalendar control onto the form.
Customize the WebMonthCalendar depending on your requirements. For this example, enable the week numbers for WebMonthCalendar.
In Visual Basic:
WebMonthCalendar1.EnableWeekNumbers = true
In C#:
WebMonthCalendar1.EnableWeekNumbers = true;
Set the WebDatePicker control’s DropDownCalendarID property to the WebMonthCalendar control’s Id property either through the Microsoft® Visual Studio® Property Window, or by using the following code:
In Visual Basic:
WebDatePicker1.DropDownCalendarID = WebMonthCalendar1.ID
In C#:
WebDatePicker1.DropDownCalendarID = WebMonthCalendar1.ID;
Run the application and you will observe the WebMonthCalendar as the WebDatePicker control’s drop-down calendar.
